Trang chủ

Tìm hiểu về Task Scheduling trong Laravel 0 (0)
Tìm hiểu về Task Scheduling trong Laravel 0 (0)
Xin chào anh em, cũng lâu lâu mình lại viết bài chia sẽ kiến thức mà mình tìm hiểu được khi học framework Laravel. Để tiếp nối series Laravel và những điều thú vị thì hôm nay mình xin giới thiệu về Task Scheduling trong Laravel. Như các bạn biết rồi đấy trong quá trình xây dựng website của chúng ta, đôi lúc chúng ta cần lên kế hoạch hay dự định cho một công việc hay nhiệm vụ chạy vào một khoảng thời gian nhất định có thể là trong ngày, trong tuần…Nếu như trong những phiên bản Laravel cũ thì chúng ta phải định nghĩa nhiều con Cron, mỗi con đảm nhận một chức năng là thực hiện một schedule mà bạn mong muốn hệ thống chạy. Và cho đến phiên bản Laravel hiện tại thì công việc này đã được cải thiện hơn nhiều, với việc sử dụng schedule của Laravel. Bây giờ chúng ta bắt đầu tìm hiểu nó nhé.
1. Đặt vấn đề
Bây giờ để hiểu rõ về Schedule trong Laravel hơn thì chúng ta sẽ thực hiện một bài toán đơn giản thế này. Chúng ta sẽ mỗi phút thêm một bản ghi vào bảng posts trong database.
2.Giải quyết bài toán
Thì trước hết chúng ta cần tạo bảng posts, model Post. Nếu bạn nào vẫn chưa rõ hai điều trên thì có thể tham khảo bài viết Migration và Eloquent Model của mình nhé.
2.1 Định nghĩa Schedules
Chúng ta có thể định nghĩa ra tất cả các công việc cần làm trong phương thức schedule ở App\Console\Kernel
<?php
namespace App\Console;
use Illuminate\Console\Scheduling\Schedule;
use Illuminate\Foundation\Console\Kernel as ConsoleKernel;
use DB;
;
use Carbon\Carbon;
class Kernel extends ConsoleKernel
{
/**
* The Artisan commands provided by your application.
*
* @var array
*/
protected $commands = [
];
/**
* Define the application's command schedule.
*
* @param \Illuminate\Console\Scheduling\Schedule $schedule
* @return void
*/
protected function schedule(Schedule $schedule)
{
$schedule->call(function () {
DB::table('posts')->insert([
'title' => 'Day la title bai viet',
'content' => 'Day la noi dung bai viet',
'publish' => 1
]);
});
}
/**
* Register the commands for the application.
*
* @return void
*/
protected function commands()
{
$this->load(__DIR__.'/Commands');
require base_path('routes/console.php');
}
}
Đây là cách đơn giản nhất, các bạn cứ viết thẳng yêu cầu trong phương thức schedule luôn. Ez đúng không nào ) Đây là cách đầu tiên chúng ta có thể viết yêu cầu để chạy schedule. Còn phần cấu hình cho máy tính để chạy schedule này mỗi phút 1 lần mình xin được nói ở phần tiếp theo sau khi đã đề xuất ra hai cách viết yêu cầu để chạy schedule nhé.
2.2 Viết yêu cầu bằng Artisan Commands
Artisan Commands các bạn nghe cũng quen thuộc rồi đúng không )) Ví dụ như là câu lệnh php artisan make:model Post chẳng hạn. Nếu các bạn chưa rõ thì có thể tham khảo bài viết Artisan này của mình để có thể hiểu hơn về nó nhé. Đầu tiên chúng ta tạo Command bằng câu lệnh sau:
php artisan make:command PostCommand
Rồi chúng ta thư mục để app/Console/Commands sẽ thấy file PostCommand.php và chúng ta sẽ viết yêu cầu trong phương thức handle như sau:
<?php
namespace App\Console\Commands;
use Illuminate\Console\Command;
use DB;
class PostCommand extends Command
{
/**
* The name and signature of the console command.
*
* @var string
*/
protected $signature = 'post:create';
/**
* The console command description.
*
* @var string
*/
protected $description = 'Create new posst';
/**
* Create a new command instance.
*
* @return void
*/
public function __construct()
{
parent::__construct();
}
/**
* Execute the console command.
*
* @return mixed
*/
public function handle()
{
DB::table('posts')->insert([
'title' => 'Nguyen Thi ha',
'content' => 'Day la noi dung bai viet',
'publish' => 1
]);
}
}
Và sau đó chúng ta nhở mở file app/Console/Kernel.php lên để đăng ký nhé
<?php
namespace App\Console;
use Illuminate\Console\Scheduling\Schedule;
use Illuminate\Foundation\Console\Kernel as ConsoleKernel;
use DB;
class Kernel extends ConsoleKernel
{
/**
* The Artisan commands provided by your application.
*
* @var array
*/
protected $commands = [
'App\Console\Commands\PostCommand'
];
/**
* Define the application's command schedule.
*
* @param \Illuminate\Console\Scheduling\Schedule $schedule
* @return void
*/
protected function schedule(Schedule $schedule)
{
$schedule->command('post:create')->everyMinute();
}
/**
* Register the commands for the application.
*
* @return void
*/
protected function commands()
{
$this->load(__DIR__.'/Commands');
require base_path('routes/console.php');
}
}
2.3 Bắt đầu chạy Schedule
Đầu tiên để chạy được yêu cầu trên là cứ mỗi phút lại thêm một bản ghi vào bảng posts trong database thì chúng ta sẽ làm những thao tác sau đây.
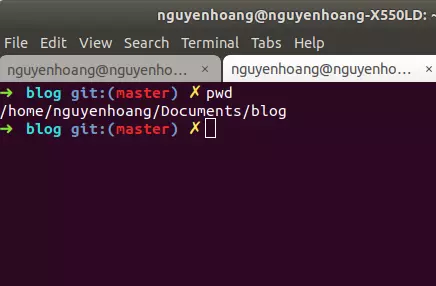
Gõ lệnh pwd để lấy được đường dẫn thư mục

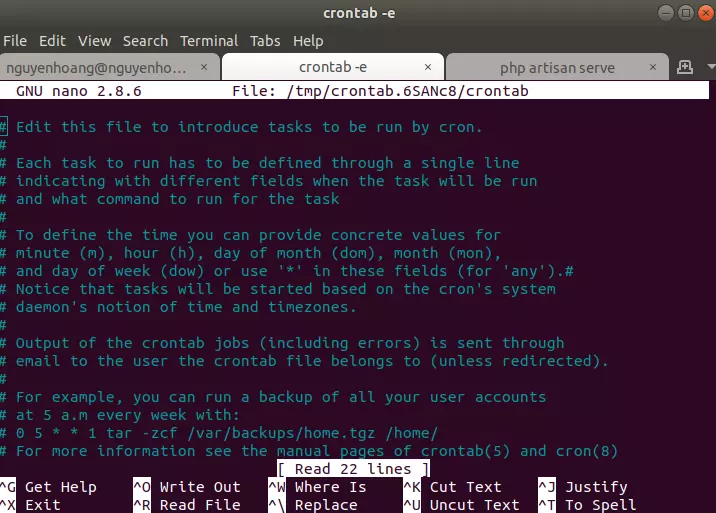
Sau đó gõ lệnh crontab -e sẽ hiện cho chúng ta để thêm schedule vào để chạy
 Sau đó chúng ta sẽ thêm câu lệnh sau vào dòng cuối cùng để chạy nhé
* * * * * php /home/nguyenhoang/Documnets/blog/artisan schedule:run
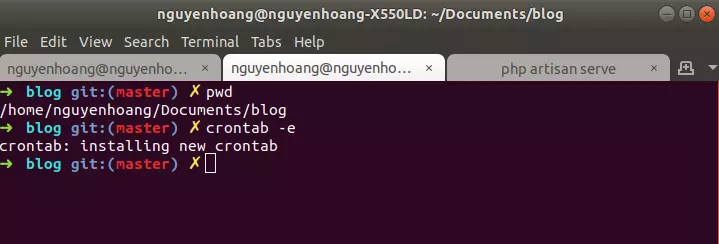
Sau đó Ctrl + X để Save vào nhé. Nếu thấy thông báo như này thì chứng tỏ lả Schedule của chúng ta đang chạy rồi nhé.

Và bây giờ các bạn vào database kiểm tra cứ mỗi 1 phút là nó sẽ thêm một bản ghi vào trong bảng posts của bạn ) Nếu như các bạn muốn dừng không chạy nữa thì các bạn sẽ thêm dấu # trước câu lệnh
#* * * * * php /home/nguyenhoang/Documnets/blog/artisan schedule:run
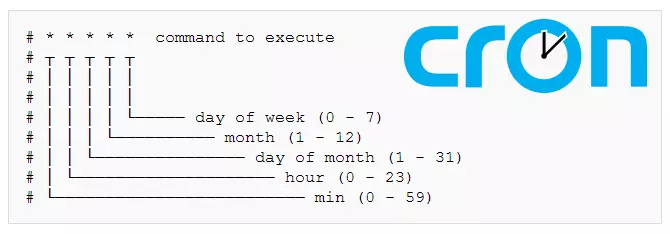
Chắc hẳn các bạn sẽ thắc mắc về những dấu * * * * * trong câu lệnh trên, các bạn tham khảo ảnh dưới này để hiểu hơn nhé.

Còn nếu không thì chúng ta có thể tham khảo các option của Laravel nhé
| Column 1 | Column 2 |
| cron('* * * * *') | Run the task on a custom Cron schedule |
| everyMinute() | Run the task every minute |
| everyFiveMinutes() | Run the task every five minutes |
| everyTenMinutes() | Run the task every ten minutes |
| everyFifteenMinutes() | Run the task every fifteen minutes |
| everyThirtyMinutes() | Run the task every thirty minutes |
| hourly() | Run the task every hour |
| hourlyAt(17) | Run the task every hour at 17 mins past the hour |
| daily() | Run the task every day at midnight |
| dailyAt('13:00') | Run the task every day at 13:00 |
| twiceDaily(1, 13) | Run the task daily at 1:00 & 13:00 |
| weekly() | Run the task every week |
| weeklyOn(1, '8:00') | Run the task every week on Monday at 8:00 |
| monthly() | Run the task every month |
| monthlyOn(4, '15:00') | Run the task every month on the 4th at 15:00 |
| quarterly() | Run the task every quarter |
| yearly() | Run the task every year |
| timezone('America/New_York') | Set the timezone |
| weekdays() | Limit the task to weekdays |
| sundays() | Limit the task to Sunday |
| mondays() | Limit the task to Monday |
| tuesdays() | Limit the task to Tuesday |
| wednesdays() | Limit the task to Wednesday |
| thursdays() | Limit the task to Thursday |
| fridays() | Limit the task to Friday |
| saturdays() | Limit the task to Saturday |
| between($start, $end) | Limit the task to run between start and end times |
| when(Closure) | Limit the task based on a truth test |
3. Kết luận
Qua một ví dụ đơn giản như trên thì mình mong rằng phần kiến thức mình chia sẻ sẽ giúp cho các bạn phần nào mường tượng ra cách Schedule trong Laravel nó hoạt động như thế nào. Cảm ơn các bạn đã đọc bài viết của mình.
4. Tham khảo
https://laravel.com/docs/5.6/scheduling
Nguồn https://viblo.asia/p/tim-hieu-ve-task-scheduling-trong-laravel-aWj53O6w56m
All the options and events can be found in official documentation


