


Multiple Image Upload in Laravel 8 Example 0 (0)

Multiple Image Upload in Laravel 8 Example 0 (0)
Multiple Image Upload in Laravel 8 Example 0 (0)

Do check out our previous tutorial about how to upload a single file in Laravel and store in the database.
If you want to know how to build a functionality to upload multiple files or images at once in Laravel, then you are at the right place.
Multiple Image Upload in Laravel 8 Example
Multiple file uploading is a simple process of uploading more than one image at the same time. A user select files using the HTML file input field and upload multiple files/images in the storage.
Laravel makes these multiple images uploading easy, and it also offers inbuilt methods to apply the file and image validation easy.
I will shed light on the request and file object to upload files and create a new database and images table for file uploading images. Will also share how to show a preview of multiple images before uploading to the server. I will take the help of Bootstrap 4 and jQuery to create image uploading form and image preview.
Check out our detailed article on Building Laravel CRUD Web Application.
Create Laravel Project
Run the following command to create a Laravel project.
composer create-project laravel/laravel --prefer-dist laravel-image-upload BashCopy
Get project folder.
cd laravel-image-upload BashCopy
Define Database Configuration
We can either use MAMP or XAMPP to setup a local web server. Define your database configuration in .env file.
DB_CONNECTION=mysql DB_HOST=localhost DB_PORT=3306 DB_DATABASE=laravel_db DB_USERNAME=root DB_PASSWORD= PL/SQLCopy
Create Model and Migrations
Create a Model and Migration using the following command.
php artisan make:model Image -m BashCopy
Place the below code in database/migrations/timestamp_create_images_table file to define the table schema.
<?php use Illuminate\Database\Migrations\Migration; use Illuminate\Database\Schema\Blueprint; use Illuminate\Support\Facades\Schema; class CreateImagesTable extends Migration { /** * Run the migrations. * * @return void */ public function up() { Schema::create('images', function (Blueprint $table) { $table->id(); $table->string('name')->nullable(); $table->string('image_path')->nullable(); $table->timestamps(); }); } /** * Reverse the migrations. * * @return void */ public function down() { Schema::dropIfExists('images'); } } PHPCopy
Place the below code inside the app/Models/Image.php file.
<?php namespace App\Models; use Illuminate\Database\Eloquent\Factories\HasFactory; use Illuminate\Database\Eloquent\Model; class Image extends Model { use HasFactory; protected $fillable = [ 'name', 'image_path' ]; } PHPCopy
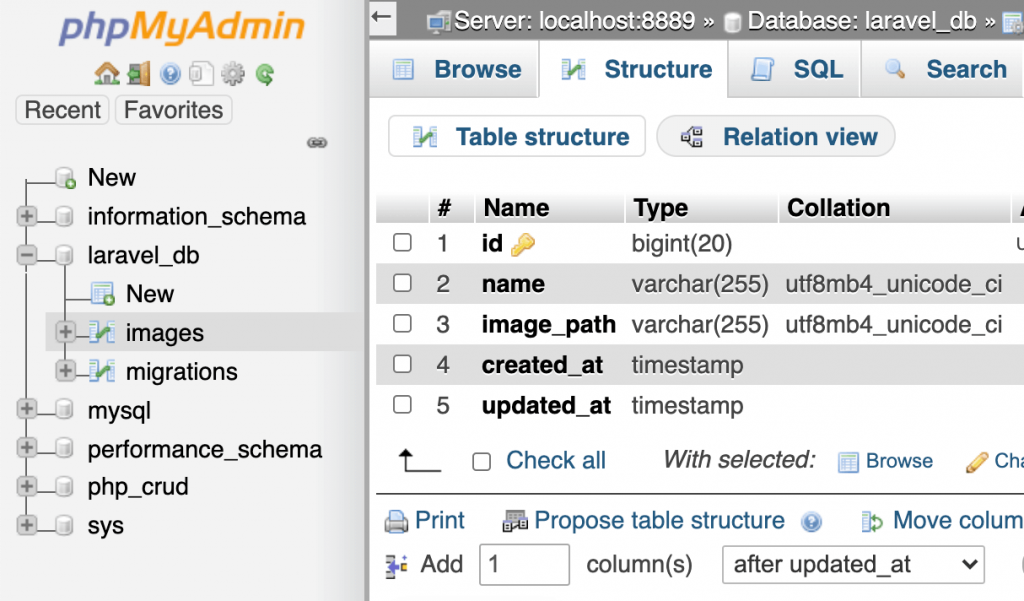
Next, execute the command to run the migration, migration can be seen in your PHPMyAdmin panel or the database.
php artisan migrate BashCopy
Create Image Uploading Controller
Run the command to generate the image uploading controller.
php artisan make:controller FileUpload BashCopy
Go to app/Http/Controllers/FileUpload.php file, and define the createForm() and fileUpload() methods to manage the image uploading in Laravel 8.
<?php namespace App\Http\Controllers; use Illuminate\Http\Request; use App\Models\Image; class FileUpload extends Controller { public function createForm(){ return view('image-upload'); } public function fileUpload(Request $req){ $req->validate([ 'imageFile' => 'required', 'imageFile.*' => 'mimes:jpeg,jpg,png,gif,csv,txt,pdf|max:2048' ]); if($req->hasfile('imageFile')) { foreach($req->file('imageFile') as $file) { $name = $file->getClientOriginalName(); $file->move(public_path().'/uploads/', $name); $imgData[] = $name; } $fileModal = new Image(); $fileModal->name = json_encode($imgData); $fileModal->image_path = json_encode($imgData); $fileModal->save(); return back()->with('success', 'File has successfully uploaded!'); } } } PHPCopy
The createForm() function brings the from in the view, and the the fileUpload() method handles uploading, storing and validation in the image uploading controller.
This controller also covered:
- Validation on image uploading.
- Displays image uploading status through message update.
- Allows specific file types. e.g. jpeg, jpg, png, gif, csv, txt, and pdf.
- Apply file size limitation upto 2MB max.
- Storing images in the laravel storage and uploaded images path in the database.
Create Routes in Laravel
Go to routes/web.php and create two routes. One for image uploading form with get method and another route for image uploading with post method.
<?php use Illuminate\Support\Facades\Route; use App\Http\Controllers\FileUpload; /* |-------------------------------------------------------------------------- | Web Routes |-------------------------------------------------------------------------- | | Here is where you can register web routes for your application. These | routes are loaded by the RouteServiceProvider within a group which | contains the "web" middleware group. Now create something great! | */ Route::get('/image-upload', [FileUpload::class, 'createForm']); Route::post('/image-upload', [FileUpload::class, 'fileUpload'])->name('imageUpload'); PHPCopy
Create Blade Template
For uploading multiple images we need a a view. Create resources\views\image-upload.blade.php file and add the following code.
<!doctype html> <html lang="en"> <head> <meta charset="utf-8"> <meta name="viewport" content="width=device-width, initial-scale=1, shrink-to-fit=no"> <link rel="stylesheet" href="https://stackpath.bootstrapcdn.com/bootstrap/4.5.0/css/bootstrap.min.css"> <title>Laravel Image Upload</title> <style> .container { max-width: 500px; } dl, ol, ul { margin: 0; padding: 0; list-style: none; } .imgPreview img { padding: 8px; max-width: 100px; } </style> </head> <body> <div class="container mt-5"> <h3 class="text-center mb-5">Image Upload in Laravel</h3> <form action="{{route('imageUpload')}}" method="post" enctype="multipart/form-data"> @csrf @if ($message = Session::get('success')) <div class="alert alert-success"> <strong>{{ $message }}</strong> </div> @endif @if (count($errors) > 0) <div class="alert alert-danger"> <ul> @foreach ($errors->all() as $error) <li>{{ $error }}</li> @endforeach </ul> </div> @endif <div class="user-image mb-3 text-center"> <div class="imgPreview"> </div> </div> <div class="custom-file"> <input type="file" name="imageFile[]" class="custom-file-input" id="images" multiple="multiple"> <label class="custom-file-label" for="images">Choose image</label> </div> <button type="submit" name="submit" class="btn btn-primary btn-block mt-4"> Upload Images </button> </form> </div> <!-- jQuery --> <script src="https://code.jquery.com/jquery-3.5.1.slim.min.js"></script> <script> $(function() { // Multiple images preview with JavaScript var multiImgPreview = function(input, imgPreviewPlaceholder) { if (input.files) { var filesAmount = input.files.length; for (i = 0; i < filesAmount; i++) { var reader = new FileReader(); reader.onload = function(event) { $($.parseHTML('<img>')).attr('src', event.target.result).appendTo(imgPreviewPlaceholder); } reader.readAsDataURL(input.files[i]); } } }; $('#images').on('change', function() { multiImgPreview(this, 'div.imgPreview'); }); }); </script> </body> </html> PHPCopy
Start The Application
We have created the view now let us start the application using the following command.
php artisan serve BashCopy
Check the application on below link:
http://127.0.0.1:8000/image-upload
Finally, we have completed the Laravel Images and File uploading tutorial, i hope you will like this tutorial.
Lượt xem : 1060